Caucasian stonecrop, also known as Phedimus spurius, is a low-growing, spreading succulent plant that thrives in rocky and dry conditions. It is commonly used as ground cover and features fleshy leaves and star-shaped flowers that can vary in color from white to red.
Overview of Caucasian Stonecrop
Caucasian stonecrop, scientifically known as Phedimus spurius, is a low-growing succulent in the Crassulaceae family. It is native to the rocky subalpine meadows of Georgia, northern Iran, and northeastern Turkey. This plant is known for its ability to thrive in dry, rocky conditions and is often found in disturbed habitats across Europe.
Characteristics
Growth Habit
Height: Typically grows 4-6 inches (10-15 cm) tall.
Spread: Can spread up to 24 inches (60 cm) wide.
Stems: Creeping stems that root at the nodes as they grow.
Leaves and Flowers
Leaves: Fleshy, scalloped, and arranged in two rows along the stems. They can be green or have reddish margins.
Flowers: Clusters of star-shaped flowers that can be white, pink, or red, appearing in summer.
Cultivation and Care
Growing Conditions
Light: Prefers full sun but can tolerate light shade.
Soil: Thrives in well-drained, sandy, or gravelly soils. It is drought-resistant and should not be overwatered.
Uses
Ideal for rock gardens, ground cover, and container planting.
Can cascade over stone walls and is suitable for green roofs.
Maintenance
Low maintenance and virtually disease-free.
Resistant to deer and rabbits, making it a good choice for various landscapes.
Caucasian stonecrop is a versatile and hardy plant, perfect for gardeners looking for low-maintenance options that add color and texture to their outdoor spaces.
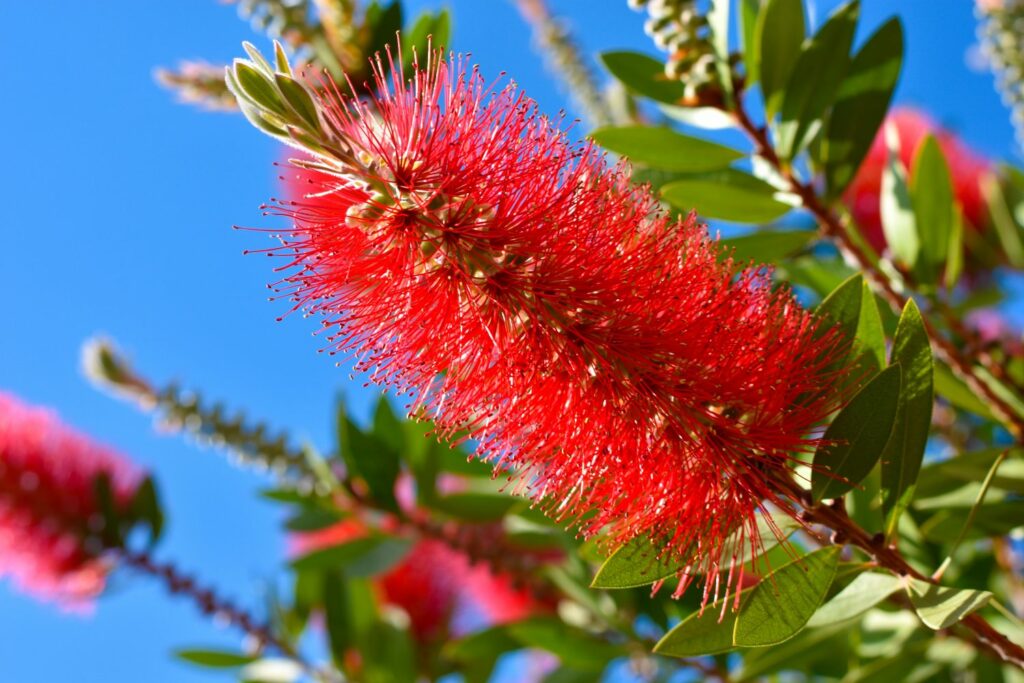
The striking inflorescences of the evergreen bottlebrush are reminiscent of bottle cleaning brushes [Photo: GiuseppeCrimeni/ Shutterstock.com]
Bottlebrush plants (Callistemon) are very popular evergreens for containers. With their unique, exotic-looking flowers, bottlebrushes will transform your patio or balcony into a beautiful tropical oasis in the summer.
There are approximately 35 known bottlebrush species belonging to the myrtle family (Myrtaceae). Bottlebrush plants originate from Australia and arrived in Europe in 1789. The genus Callistemon was described taxonomically for the first time in 1814. One of the most well-known Callistemon species is the crimson bottlebrush (Callistemon citrinus), an evergreen that reaches up to 7 m high in its natural habitat in Australia. Bottlebrush plants also grow into stately bushes in Mediterranean regions. In temperate climates, on the other hand, they only reach up to about 3 m high. They grow as upright shrubs or small trees with overhanging branches and bloom continually throughout up to four flowering periods between May and September.
Bottlebrush flowers form cylindrical clusters which are arranged in spikes and have numerous long stamens projecting vertically outward. They resemble the end of a bottle brush cleaner, hence the name. Crimson bottlebrushes produce bright red flowers. The flowers of other species bloom in various shades of red, orange, yellow and white. The leaves of Callistemon citrinus are lance-shaped, grey-green in colour and have a hard surface which protects the plant from excessive water loss through evaporation in its hot natural habitat. The leaves also contain essential oils and, when rubbed between the fingers, exude a pleasant lemony scent.
via
Growing bottlebrush
Since bottlebrush is not hardy, we can only grow it in pots here in the UK. This way, you can bring them inside and overwinter them in a suitable place. From about April, when no more frosts are expected, you can take your bottlebrush plant outside again. In accordance with the conditions of its natural habitat, bottlebrush plants need lots of sunlight. So, choose a warm, wind-protected full sun spot on your balcony or in your terrace or garden. In October, move your Callistemon back to a frost-proof place. Bottlebrush plants can also be kept year-round as houseplants in a conservatory or bright room. That said, keeping bottlebrush plants indoors means they will not have a proper dormancy period, so you cannot expect them to flower quite as abundantly.
With the right care, the bottlebrush keeps forming new flowers [Photo: Olha Solodenko/ Shutterstock.com]
Choose a big enough container to plant your bottlebrush in, allowing plenty of space for the roots to grow. Repot young bottlebrush plants into larger containers annually in spring. These plants need well-draining soil, slightly acidic soil that is relatively low in lime. Peat-free potting soils, such as our Plantura Organic Flower Compost, are ideal. For better drainage, add some expanded clay balls or lava chippings to your soil.
Organic Flower Compost, 40L
Perfect for all flowering plants in garden beds & pots
For beautiful blossoms & healthy plant growth
Peat-free & organic soil: CO2-saving composition
Tip: Young bottlebrushes are especially susceptible to root rot, so it is important to use a high-quality, well-draining soil.
Given the right care, bottlebrushes will flower abundantly. Besides water, they require the occasional bit of fertiliser during the growing season in summer. Pruning young bottlebrush plants regularly encourages them to bloom and helps them grow more compactly.
Watering bottlebrush plants
Young plants in particular require lots of water and do not tolerate drought. If the root ball dries out, the plant will produce fewer flowers and shed its leaves. To avoid this, check the soil moisture daily. Water your bottlebrush once the top 2 cm of soil feels dry. Make sure that the pot has a drainage hole at the bottom to allow excess water to drain into a saucer, otherwise the soil may become waterlogged. This can eventually lead to root rot and severely damage the plant. Put clay shards in the bottom of the pot to further improve water drainage.
How to fertilise bottlebrush
To ensure your bottlebrush plant keeps producing lots of beautiful flowers, fertilise it regularly during the growing period. Our Plantura Liquid Flower Food is great for this. It reliably supplies Callistemon plants with all the key nutrients. From April to September, add a little liquid fertiliser to your watering can and fertilise the bottlebrush every one to two weeks. When using our Plantura Liquid Flower Food, add 3 to 4 ml of liquid fertiliser for every litre of water.
Liquid Flower Food, 800ml
Perfect for all flowers & balcony plants
Liquid fertiliser for a lush blossom throughout the season
Quick & easy application - child & pet friendly
Pruning bottlebrush plants
Bottlebrush plants can be pruned in spring and late summer. Selective pruning helps you to maintain your bottlebrush plant’s shape and encourage it to bloom. After flowering, the shoots, at the ends of which the flowers are located, continue to grow in long rods. Due to these spreading shoots, Callistemon plants can quickly lose their compact shape. To rectify this, remove any wilted flowers. This will encourage new branches and flower buds to grow beneath the pruned sections. In addition to pruning for aesthetic purposes, always remove damaged or dead shoots. Brown shoots in the middle part of the plant often indicate a lack of light. To remedy this, thin out the plant a bit so that all areas get enough light. If you want to grow your bottlebrush into a bottlebrush tree with a trunk and crown, prune in early spring to avoid disturbing budding and flowering.
Bottlebrushes do not tolerate cold and ice at all and must be overwintered indoors [Photo: Konstantinos Livadas/ Shutterstock.com]
Overwintering
Callistemon plants are not hardy and must be moved to a frost-proof location in the autumn. In winter, keep them somewhere as bright as possible and ensure temperatures stay between 5 and 10 °C. You can also overwinter your bottlebrush indoors in a warmer place. However, as previously mentioned, keeping bottlebrush plants indoors prevents them from going dormant as they will not be exposed to cold enough temperatures. This lack of dormancy leads to reduced flowering the following year. Keep the soil moist throughout the winter, but do not fertilise your bottlebrush during this period.
Propagating bottlebrushes
You can propagate bottlebrush plants by seed or by cuttings. The bottlebrush is a pyrophyte, which means that its seed pods can last for years and only burst open and release the seeds when exposed to intense heat. In its natural habitat of Australia, the bottlebrush, like other pyrophytes, strategically spreads its seeds on fertile ground during bushfires when its own existence is being threatened by the fire.
To get to the seeds, you will need to heat the fruit capsules of the bottlebrush either over a flame or in the oven. Exposure to heat simultaneously breaks seed dormancy and forces them to germinate. Sow your bottlebrush seeds in growing trays filled with soil. Opt for a low-nutrient growing medium, such as our peat-free Plantura Organic Herb & Seedling Compost. Since bottlebrush seeds require light to germinate, only cover them with a very thin layer of substrate or not at all. The optimum germination temperature is 15 °C. Keep the soil moist.
To propagate bottlebrush plants by cutting, take around 10 cm-long, ideally flowerless and minimally woody head cuttings from the shoots. Remove the lower leaves, leaving only the top pair of leaves. Cut at an angle with a sharp knife to maximise the area from which new roots will form. You can also use rooting powder to stimulate root growth. Place the cuttings in containers filled with potting soil and place them in a bright place without direct sunlight, ideally somewhere between 18 °C and 20 °C. Always keep the soil moist with a spray bottle. You can also place a plastic bag or something similar over the container to help keep humidity high. Just make sure to air things out for a few minutes each day. You will know when the cutting has successfully taken root once you see new leaves growing. At this point, you can plant the seedlings into the same type of soil as mature Callistemon plants need and keep them in a sheltered, sunny to partially-shaded location at first.
Bottlebrush plants are pyrophytes that release their seeds when exposed to heat [Photo: GABLIYA ALISA/ Shutterstock.com]
Tip: Propagating bottlebrush via cuttings is usually more successful and faster than propagating by seed. Bottlebrushes propagated by cuttings are also more likely to bloom.
Wondering whether bottlebrush plants are poisonous? Luckily, there are no known toxic effects of the bottlebrush. Nevertheless, it is an ornamental plant that is not suitable for consumption.
How long do flowers last once cut? That's a surprisingly complex question because there are so many variables that can impact their longevity. Some blooms may start to wilt away after only a few days, while others may last as long as two weeks. If you want to maximize the vase life of your next bouquet, these tips can help keep your flowers looking their best as long as possible.
How long flowers last after being cut is referred to as their vase life. While cut flowers can begin to wilt between three and five days after they've been cut if placed in a flower vase with water, some flower varieties last much longer. There are many factors involved. The kind of flower, location of the vase, and what's added to the water all impact how long a bouquet remains beautiful.
The best type of flower to cut for maximum shelf life are those which are young and haven't yet fully opened their petals. They'll continue to develop after you cut them, so you can enjoy the blooms for longer. For roses, though, the development doesn't continue, so pay attention to the color of the buds.
Certain types of flowers also last longer than others. Tulips (Tulipa), daisies (Bellis perennis), and poppies (Papaver) tend to have a shorter vase life than carnations (Dianthus caryophyllus), chrysanthemums (Chrysanthemum), and Gerbera daisies (Gerbera).
Additionally, flowers should be cut either in the early morning or the late evening, since that's when a flower — or any plant for that matter— contains the maximum amount of water.
Choose a vase that fits the bouquet well. A vase with a large mouth can make a small bouquet lose its shape. A vase with a neck that's too small for your bouquet smashes the stems together and makes everything look crowded.
Have the vase full of water and ready to go before you cut the flower stems. The water temperature can affect how long the flowers last. Cold water is the best option if you want to make the bouquet last as long as possible. Warm water encourages the flowers to open more.
The way you cut a flower's stem can also affect its vase life. Cut off 1 to 2 inches of the flower stems with a sharp knife or pruning shears. A clean cut will leave the stem open to absorb more water, whereas a crushed stem will be like a crushed throat, unable to drink. Additionally, stems should be cut at an angle, as flat stems will sit on the bottom of a vase and not absorb the necessary amount of water.
Pruning Cut Flowers
Image Credit: Dmitry Gladkov/iStock/GettyImages
Before placing a flower into a vase, it's a good idea to trim off lower leaves on the stem which aren't necessary for decoration. This will streamline the water intake so that the flower itself is receiving the nutrients rather than vestigial things like leaves. Removing those lower leaves that are under the water will also reduce the risk of bacterial growth, which can shorten the life of the flowers.
Keep vases of flowers out of direct sunlight and in cooler locales. While live flowers need sunlight and warmth, flowers in a vase are dying, and the warm temperatures and sun will only make them fade and dry out more quickly. Cooler locales will keep moisture in the flower and preserve it longer.
Changing the water on a daily or bi-daily basis can add greatly to the longevity of a flower's vase life. Additionally, preservatives can be added to the water to increase vase life even further. A good recipe for a homemade preservative is to take 1 teaspoon of sugar, 1 teaspoon of bleach, and 2 tablespoons of lemon or lime juice mixed into warm water.
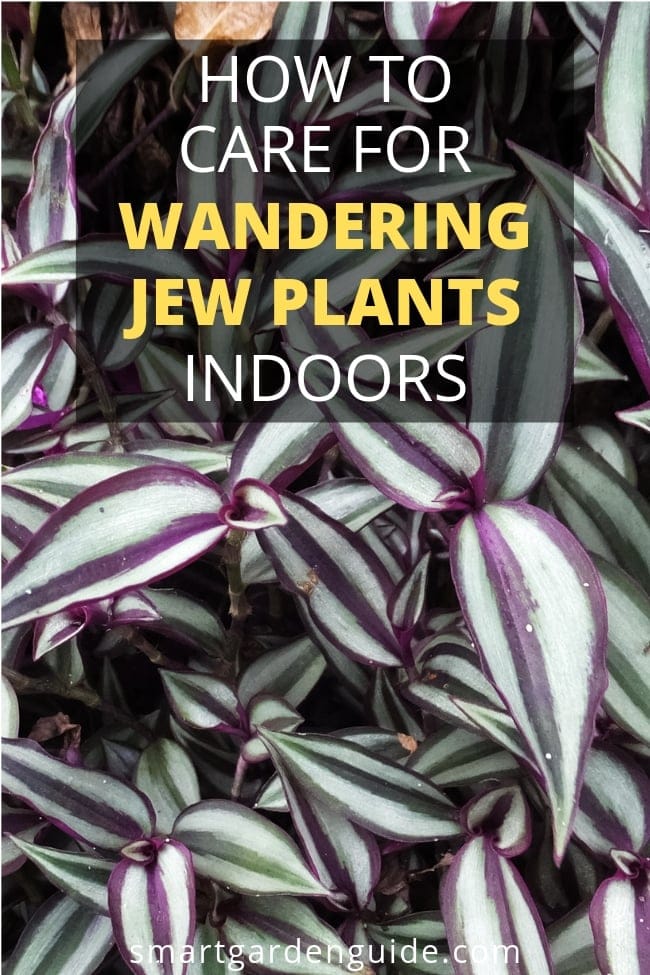
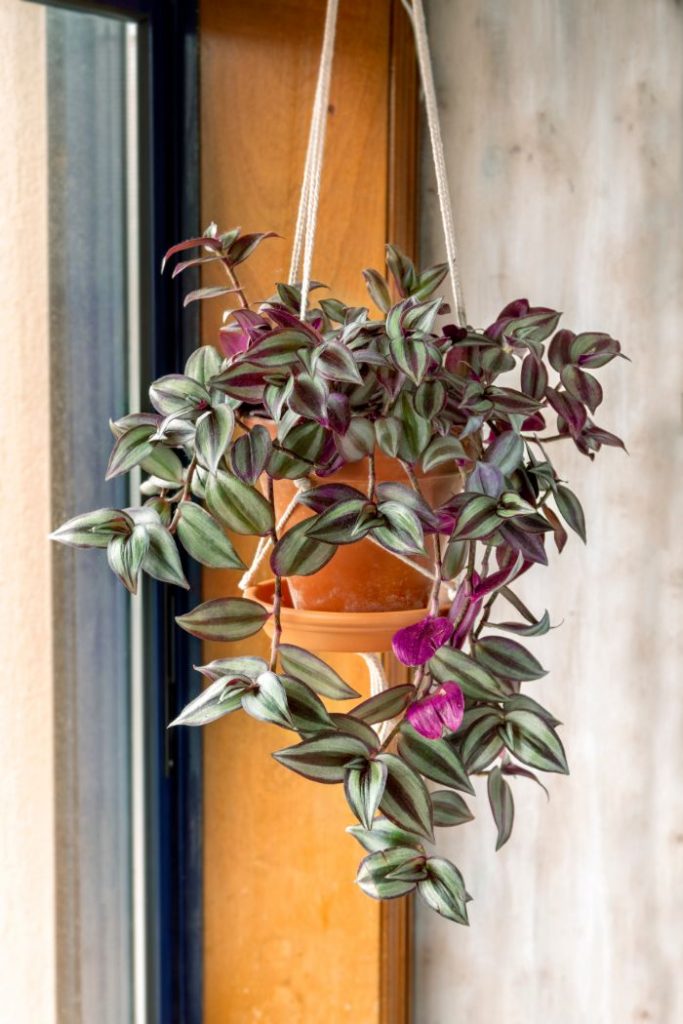
When it comes to houseplants able to brighten up indoor spaces, it doesn’t get much more colorful than the variegated foliage of a Wandering Jew plant (Tradescantia zebrina). With their hardy nature and ease of care, they are a perfect choice for those feeling they kill everything they bring indoors. We’ve listed a quick summary of their care below.
How To Care For A Wandering Jew Plant: Grow your Wandering Jew in well-drained soil, kept moist but not soggy through regular watering. Create humidity, keep indoor temperatures between 50°F (10°C) to 85°F (29°C) and fertilize monthly.
Continue reading because we’ve taken all the guesswork out of caring for your Wandering Jew and keeping it healthy and happy for years to come.
Wandering Jew plants belong in the Commelinaceae family, which includes around 652 different species. The family is made up of herbs, climbers and several epiphytes, with some used as outdoor and indoor ornamentals like Wandering Jew.
There are three different plants commonly known as Wandering Jews; Tradescantia fluminensis, Tradescantia pallida, and Tradescantia zebrina. Of the three, Tradescantia zebrina is the most common one grown and has the most eye-catching and colorful foliage. All three have the same requirements for care and good growth.
Native to Mexico and Guatemala, Wandering Jew is classified as a tender evergreen perennial that performs well planted outdoors in frost-free regions. Those living in cooler environments can easily grow it as an indoor plant planted either in containers or in hanging baskets. Outdoors it’s typically used as a quick-growing groundcover.
Although a common name shared with several very different plants, Wandering Jew is often called Inch Plant, due to the leaf margins being spaced about an inch apart. You may also find Wandering Jew listed as Zebrina Pendula, but is synonymous with Tradescantia zebrina and is the same plant.
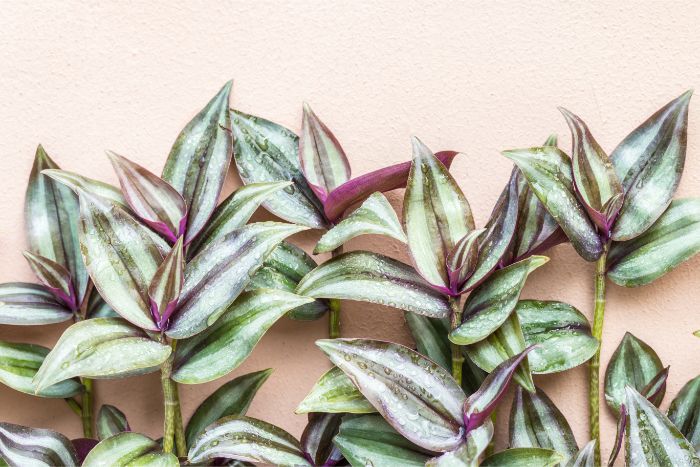
When it comes to Wandering Jew plants, it’s all about the attention-grabbing foliage. The succulent stems give way to leaves that are a deep purple on their undersides with the upper portion striped in silvery-gray and greenish-blue. The oval leaves grow to about 2.5 inches long and the stems grow about 2 feet long. It makes a beautiful plant used in hanging baskets, with the long stems cascading over the side.
Even grown indoors, Wandering Jews have a fast rate of growth and before you know it, the plants will be spilling over your container’s or hanging basket’s sides. Whereas some indoor plants seem to take forever to fill out, this isn’t a problem with properly cared for Wandering Jew plants.
There are several other cultivars (varieties) of Wandering Jew, which include:
‘Purpusii’ has unstriped, hairy foliage that is either solid red or reddish-green.
‘Quadricolor’ produces metallic-green foliage striped in red, white and green.
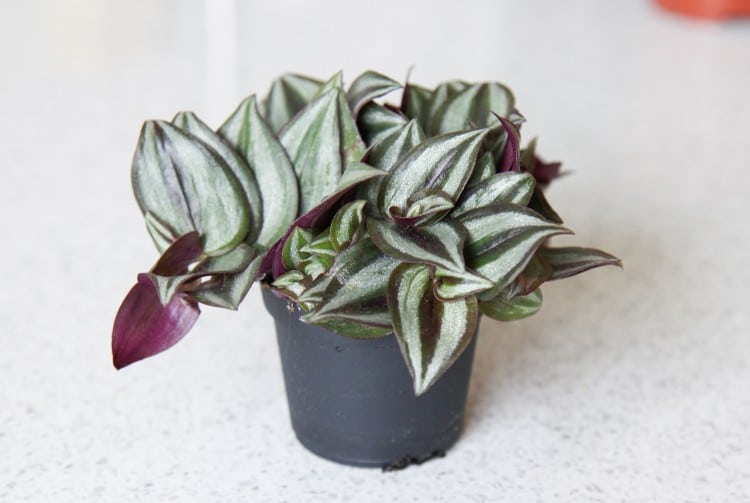
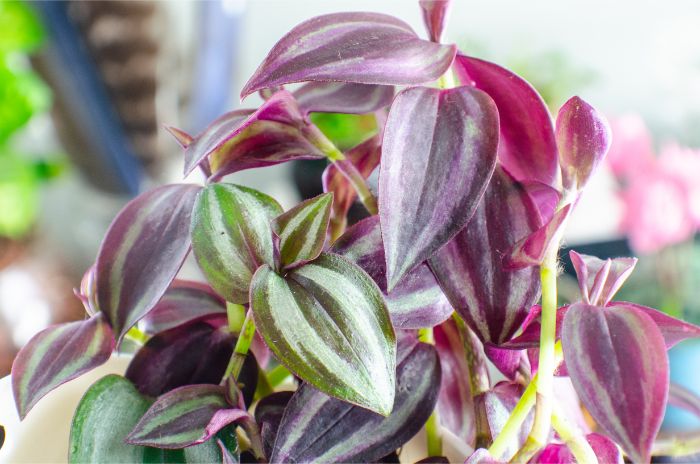
Wandering Jew plants are the ideal candidates for beginner houseplant gardeners due to their hardiness and robust growth. Below we’ve outlined all the basics of their proper care, as well as identifying and preventing any potential problems so you can enjoy your Wandering Jew for years to come. The best indoor plants are those that are happy and healthy.
The beautiful foliage of Wandering Jew Plant (Tradescantia zebrina)
Soil Conditions For Wandering Jew Plants
Wandering Jew plants tolerate growing in a wide range of soils provided they drain well. Although they do tolerate and prefer moist conditions, the soil must drain properly to prevent root and stem rot from occurring. Therefore, it is necessary to use a lighter weight soil mixture in your pots rather than heavier soils that don’t provide proper drainage.
Straight potting soils are usually too heavy, retain too much moisture and have a tendency to leave the soil soggy. You can use a heavier potting soil in your soil mixture, just be sure to incorporate a lighter soil mix to provide the Wandering Jew the drainage required for healthy growth.
Commercial potting mixes work well and many have a slow-release fertilizer mixed in, which cuts down on the need for frequent feedings. The slow-release blends usually continue to fertilize the Wandering Jew for about three months.
You can also make your own soil by mixing several ingredients together such as:
Using equal parts of compost and a potting mix.
Mixing equal portions of compost, peat and potting soil or a potting mix.
Using equal portions of a course sand, compost and potting soil or a potting mix.
Whatever soil you choose to use, just make sure it drains well and contains a bit of fertility for the best performance of your Wandering Jew plants.
Preferred Light Conditions
Although Wandering Jew plants tolerate lower light conditions than many houseplants, to help retain those striking colors the plant is known for, place the container in a location indoors receiving filtered sunlight. If your plant starts losing some of the color in the foliage, move it to a location that receives a bit more light.
In addition, if the lower portion of the stems start suffering leaf drop, the Wandering Jew isn’t get enough light and needs to be relocated to a brighter area inside the home.
Once the warm weather of spring arrives and if you’d like to give your Wandering Jew a bit of a break from its indoor location, place it in an outdoor spot that receives partial sun to partial shade. Moving it to an outdoor location with too much sun may leave the foliage sunburned.
Indoor Temperature Requirements
In the Wandering Jew’s native environment, temperatures are consistently warm without the threat of frosts or freezes. Generally, if the indoor temperatures inside your home are comfortable for you, they will also be comfortable for your Wandering Jew plant.
Indoor temperatures between 50°F (10°C) to 85°F (29°C) are a good range for your Wandering Jew plants. Plants grown in this temperature range produce the healthiest growth.
If you gave your plants a break from their indoor location, just make sure to bring them back indoors before the cold weather of winter strikes.
Water Requirements
Wandering Jews prefer soils that are regularly kept moist, not soggy, compared to many indoor houseplants. However, this doesn’t mean the soil should be kept so wet they never begin to dry out. Keeping the soil too wet for too long promotes rot to set in and you may end up killing your Wandering Jew plants. Your Wandering Jew is more likely to forgive you if you forget to water over watering too much and too often.
A good rule to follow is if the soil starts to feel like it’s about to become very dry, apply water. It’s easy to know exactly when to water by:
Sticking your finger into the soil and if the top inch is starting to feel dry, water until it runs from the container’s bottom drain holes.
During the warm growing season of spring through summer, you can probably expect to water once each week. However, during winter when the Wandering Jew goes into dormancy (its growth slows), you will probably only need to water about every other week.
Humidity Requirements
Compared to many tropical plants grown indoors, Wandering Jew plants aren’t quite as fussy about humid conditions, but still need some humidity for the best growth and performance. Don’t let the thought of creating a humid environment stress you out because replicating humidity for your indoor plants is relatively easy and basic.
Fill a spray bottle with room temperature water and mist the Wandering Jew several times each week.
If you’re growing the Wandering Jew in a container and not in a hanging basket, you can set the pot on a tray of pebbles. As you water, the water seeps from the bottom drain holes onto the tray of pebbles and as it evaporates, it creates a humid environment around the plant.
If your bathroom gets the appropriate amount of light for the Wandering Jew, you can allow it to grow there. Due to the regular use of water in a bathroom, moisture is created, creating the humidity the Wandering Jew requires.
Fertilizer Needs
Unless the soil mixture contains a slow-release fertilizer blend, which feeds the Wandering Jew for about three months, fertilizing monthly is sufficient for proper growth. You have several choices when it comes to fertilizer you can use for your Wandering Jew plant.
Use a houseplant fertilizer applied at half-strength, applied when you do your regular watering.
Use an all-purpose, water-soluble blend for outdoor and indoor plants, applied at half-strength and used during your regular watering schedule.
If your soil mixture didn’t contain a slow-release fertilizer or it’s been about three months, if one was contained in the soil, you can reapply slow-release fertilizer granules sprinkled over the top of the soil. Follow the package directions on amounts.
When it comes to the appropriate time of year to fertilize the Wandering Jew, only fertilize while it’s actively growing, which is spring throughout summer. In winter, the plant goes through a dormant stage and all growth slows, so there is no need to apply fertilizer. Wait until spring arrives before you resume fertilizing the plant.
The one thing you will need to pay attention to when it comes to fertilizing is the buildup of salts in the soil, which can result in foliage burns. Wandering Jew plants have a low tolerance to salty soils. Preventing any salt buildup is relatively simple:
If the plant isn’t too big, you can take the entire pot to your sink or bathtub and allow water to run slowly through the soil for about five minutes, flushing out any salts.
If the plant is too big for indoor flushing, take it outside and allow water from the hose to run slowly through the soil for about five minutes. Allow the water to drain and then bring the plant back indoors.
Pruning Requirements
The pruning needs of Wandering Jew plants are low. If you want to control the size of the plant and promote bushier growth, you can pinch off the tips of the stems. To keep the plant always looking its best, you can trim off any broken, dead or damaged stems and leaves throughout the year.
When using pruning tools to trim your Wandering Jew always make sure they are clean so you don’t transfer any diseases or pests to your plant. This is as easy as wiping off the blades with alcohol.
Some people experience skin irritations when handling the cuttings due to the sap, so if you are unsure if you are one of these unlucky gardeners, it might be best to wear gardening gloves when pruning or handling Wandering Jew cuttings.
Potting Needs
If you purchased your Wandering Jew already potted in a hanging basket or 1-gallon container, it should thrive as is for a year or more before it requires repotting. However, if you received rooted cuttings in smaller containers like 4- to 6-inch pots, you most likely need to repot them into something a bit larger so they can grow properly.
This also cuts down on the need for repotting in a month or two as the Wandering Jew begins to outgrow its present pot.
When it comes to the pot’s material, any type works quite well for growing this plant from clay to plastic. However, if you grow your Wandering Jew in a pot made of a porous material like terra cotta, the soil is going to dry quicker than if it was growing in a plastic pot. This means you will need to water more frequently.
Once your Wandering Jew starts getting too big for its present container, it’s time to repot it into one that is around 1- to 2-inches larger. Although the plant likes a moist soil, make sure the pot has bottom drainage to prevent the possibility of rot due to conditions that are too wet.
If you like, you can dress the container up by placing the draining one inside a decorative pot without bottom drain holes, but be sure to empty out any additional water once the inner pot thoroughly drains.
I think a decorative outer pot can add so much to the beauty of your houseplants, so I do this with almost all of my houseplants. Read this article which discusses my favorite decorative planters if you need some inspiration.
Potting and repotting your Wandering Jew is basic:
Gently remove the Wandering Jew from its present container, being careful not to break the succulent stems.
Fill the new container that drains about a quarter of the way full with a fertile, well-drained potting mix.
Check the Wandering Jew’s root system and if it’s growing bunched together and filled the previous pot, gently tease the roots apart with your hands.
Place the Wandering Jew into the new container and finish filling it with soil.
Water the Wandering Jew until it runs from the bottom drain holes and place in a bright location indoors.
Propagating New Plants
When it comes to propagating new plants, Wandering Jew is about as easy as it gets. Even if you have never done this before you should have success starting its cuttings. When you trim to control its size, don’t throw those cuttings away but use them to start additional plants.
You have two choices when it comes to rooting your cuttings and both are easy. The first thing you will want to do is obtain your cuttings. Trim off a 4- to 6-inch cutting from the mother plant and you’re ready to start rooting.
Rooting in Soil
Fill a 6-inch to 1-gallon container that drains with a rich, well-drained potting mix. Water the soil to settle it.
Make about a 2-inch indentation in the soil where you want to place the Wandering Jew cutting.
Remove the bottom leaves from the cutting where you will be inserting it into the soil. You can do this by pinching them off with your fingers.
Place the cutting into the indentation and firm the soil up around it with your fingers.
Water the soil again and place the cutting in the same light conditions where the mother plant was thriving. Keep the soil moist but not soggy.
Roots should form in about four weeks and after about eight weeks, the Wandering Jew cuttings should form a new root system.
Rooting in Water
Fill a glass jar or plastic container with about 3-inches of room temperature water.
Pinch off any leaves from the section of the Wandering Jew cutting that will be submerged in the water.
Place the cutting in the water and situate the container in a bright indoor location.
Change the water in the container about every other week, or when cloudy.
You should start seeing new roots form on the cuttings in several weeks. Once the roots are several inches long, you can repot the cuttings into a draining container filled with fertile, well-drained soil.
Disease Problems
Wandering Jew plants grown indoors are hardy and don’t have major diseases that plague them.However, rot is their biggest enemy and caused by soils that are too heavy and do not drain properly, retaining too much water. Overwatering and planting in pots that don’t drain are other causes of rot problems.
When rot rears its ugly head you’ll notice the bottom stems, as well as the foliage turning black, becoming mushy and the entire plant collapses. If this happens and seems to start affecting the entire Wandering Jew plant, you can trim off healthy, unaffected sections of the stems and repot into fresh, clean soil. Since there is no saving the rot-infected sections, you will have no choice but to discard those portions of the plant.
Steps for preventing problems with rot include:
Using lightweight potting mixes that drain well and aren’t too heavy, which leads to the soil remaining too wet for too long. Some types of potting soils have a tendency to be heavy and need mixing with a potting mix, compost, coarse sand or peat.
Don’t overwater your Wandering Jew. Although they prefer growing in moist soils, this doesn’t mean constantly soggy soil. Stick your finger into the soil and if the top inch is starting to become dry, apply water until it runs from the bottom of the pot.
Make sure the pot you are growing your Wandering Jew in has bottom drainage. If you have placed the pot inside a decorative one that doesn’t drain, make sure to empty all the water from it after you have watered.
Pest Problems
Although indoor Wandering Jew plants are not big candidates for problems with pests, several can cause an infestation and problems. As with any pest problem indoors or outside in the garden, quick control is always the best option to keep your plants healthy. It also assures the pests do not migrate to your other plants causing even bigger problems and headaches.
The pests most likely to infest your indoor Wandering Jew plants are:
Aphids: Aphids come in a host of different colors and are tiny, pear-shaped, sap-sucking insects that usually congregate in large masses along the Wandering Jew’s stems. In large infestations, they can kill the plant or severely weaken it. If the infestation is small, you can wipe the pests off the stems with a moist cloth. However, if the infestation is large, you will probably have to spray the plant with an insecticidal soap or Neem, reapplying as suggested on the package.
Spider Mites: Spider mites are another sap-sucking pest that if left unchecked can quickly kill or weaken the Wandering Jew. It is easy to tell if you have a spider mite problem as these tiny, white pests spin fine webbing that covers the plant. Spider mites can be the bane of houseplants so quick control is necessary. Use an insecticidal soap or Neem and spray the entire plant, reapplying as suggested on the product label.
Whiteflies: Whiteflies are other sap-sucking pests that can quickly kill or weaken your Wandering Jew if not quickly controlled. They are another easily identifiable pest, as just touching the plant sends the tiny whiteflies from the plant’s foliage and into the air, hovering right above it. Control the problem with an insecticidal soap or Neem, spraying the entire plant and reapplying as suggested on the product’s label.
Mealybugs: Sap-sucking mealybugs show up on the Wandering Jew as cottony masses covering the stems and crotches of the foliage. Control the problem by spraying the entire plant with insecticidal soap or Neem, reapplying as suggested on the product’s label. If the infestation is small, you can also wipe them from the stems and leaves with a damp cloth.
Is Wandering Jew A Perennial?
Wandering Jew plants are considered a tender, evergreen perennial. Unlike annuals, and if grown in preferred conditions with proper care, Wandering Jews should live and keep on growing for quite a few years, both indoors and outside.
Why Are My Wandering Jew Plant’s Leaves Losing Their Color?
If your Wandering Jew is growing in light conditions that are too low, the leaves will start to lose their color and become duller. When grown indoors and to keep the bright color on the foliage, make sure the Wandering Jew is growing in a location receiving bright light.
Why Are My Wandering Jew’s Leaves Dropping?
Wandering Jew plants grown in light conditions that are too low will start dropping leaves at the base of their stems. Solve the problem by moving the plant to an indoor location that is brighter. For the best leaf color and growth, they prefer an indoor location receiving bright light.
Why Are My Wandering Jew Cuttings Rotting In Soil?
If your Wandering Jew cuttings are rotting in soil it could be one of two things causing the problem. The soil you are growing the cuttings in may be infected with a fungus that is infecting them with rot.
You can solve the problem by planting the cutting in a sterile, well-drained potting mix. Another cause might be the soil is remaining too soggy and the container doesn’t drain.
Make sure you are using a soil that drains well and doesn’t remain soggy, do not overwater and use a container with bottom drainage. Water the cuttings when to top inch of soil feels dry to the touch.
Can I Root Wandering Jew Cuttings In Water?
Wandering Jew cuttings root quite well in water. Fill a container with several inches of water, remove any leaves that would be submerged and stick the cut end into the water.
Fill the container with fresh, clean water about every other week. You should start seeing root form on the cuttings in several weeks. Once the roots get several inches in length, you can repot the cuttings in a draining container with rich, well-drained soil.
Are Wandering Jew Plants Toxic?
When it comes to humans, Wandering Jew’s sap can cause skin irritation in humans that are allergic to it. Therefore, it’s best to wear gardening gloves when handling or pruning the plant.
The plant is listed as toxic to dogs and cats, due to its tendency to cause skin allergies and dermatitis. To keep your pets and children safe, make sure you situate your indoor Wandering Jew out of the reach of both.
When grown outdoors, Wandering Jews produce small, three-petaled, lavender flowers, but the plant rarely ever blooms grown indoors as a houseplant.
Can I Grow Wandering Jew Outdoors?
Wandering Jew plants grow as perennials planted outdoors in frost-free climates, however, those with cooler weather can plant outdoors and treat it as an annual.
What’s The Growth Rate For Wandering Jew Plants?
When grown in proper conditions with proper care, Wandering Jew plants are considered fast growers.
Many thanks for reading my guide to Wandering Jew care. This really is a great indoor plant for your home. Beautiful and easy to care for, its hard to go wrong.
If you want more help with looking after your indoor plants, check out the rest of my articles, and head over to my resources section, where I have some great recommended resources, books and equipment to help you grow healthier, more beautiful plants.
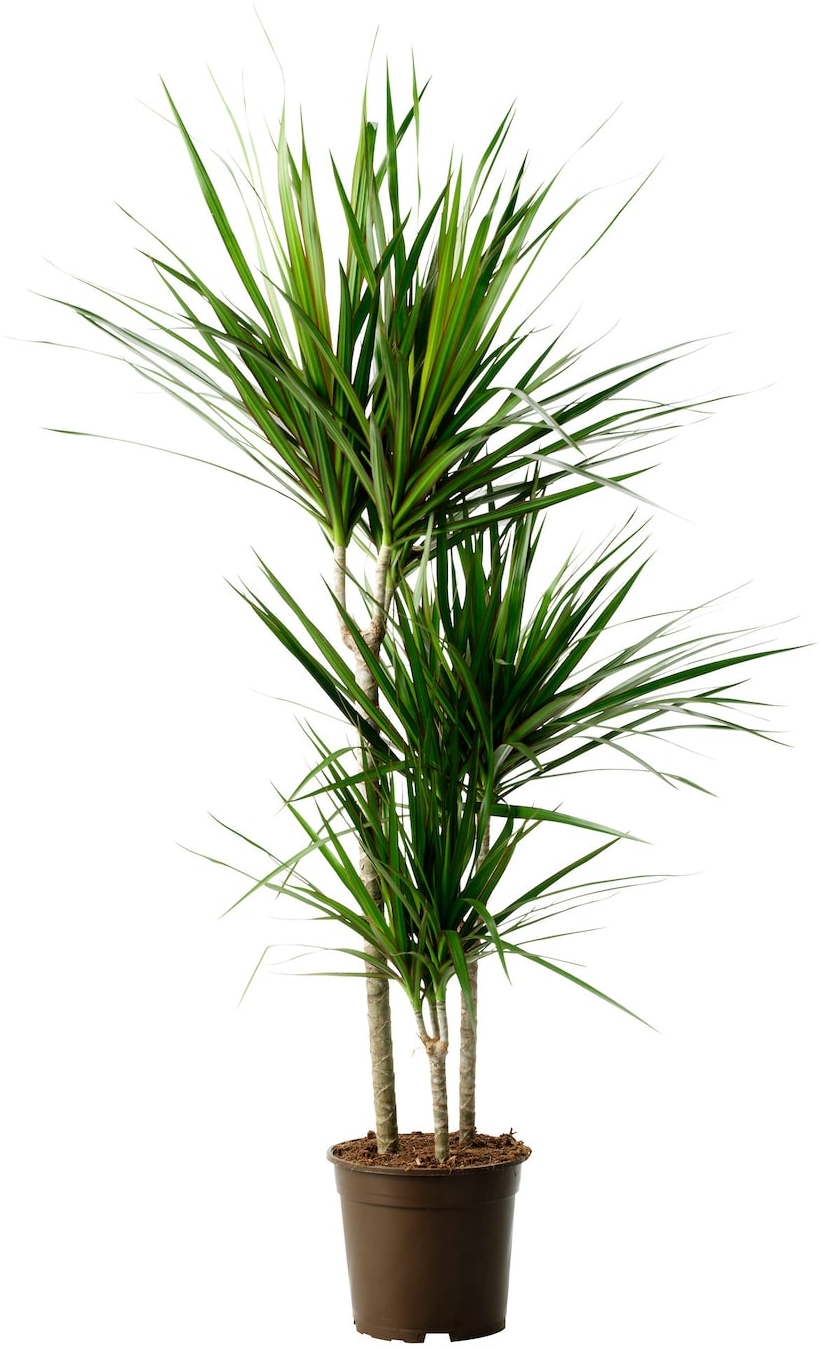
Dracaena marginata, also known as dragon tree, is a particularly eye-catching houseplant
Dracaena marginata – ‘Dragon Tree’ – is an evergreen that commonly finds a home in offices and homes in temperate climes such as the UK.
It is also named D. reflexa var. angustifolia in its native range – in Madagascar, and the Indian Ocean islands.
Overview
Botanical Name
Dracaena marginata
Common Name(s)
Dragon Tree
Plant Type
Houseplant
Native Area
Madagascar
Hardiness Rating
H1B
Foliage
Evergreen
Flowers
Small flowers, rarely seen
When To Propagate
March, April, May, June, July, August, September
When To Prune
March
Sunlight
Preferred Full Sun
Exposure Sheltered (Indoors)
Size
Height 2.5 – 4M
Spread 1.5 – 2.5M
Soil
Preferred Loam
Moisture Well drained
pH Any
It is a towering tree, which can grow over 3m in height, with trunks as wide as a man’s leg, or even wider.
It is a tropical plant, which thrives in the intermittent heavy rains and droughts of its native range.
When grown as a houseplant in temperate climates, it will not grow anywhere near as large.
Typically, when grown in a container indoors, Dragon trees will have a height of around 2m or so, rarely exceeding 1.5m.
In its native range, it produces tiny white flowers in the spring, though it is extremely rare for this plant to flower at all when it is grown indoors.
It is a tender plant (H1B hardiness rating), meaning it is generally grown indoors in the UK but can be grown outside in the summer months when temperatures are consistently over 10°C.1
Even though a Dragon Tree grown as a houseplant cannot hope to compete with the wonderful wild specimens, it can still be a very attractive addition to your home.
These plants have sword-like green leaves with reddish edges, which fan out a little like a palm atop a slender trunk.
Why Grow Dracaena marginata?
D. marginata is an extremely popular houseplant for a number of reasons.
For one thing, it has a bold, architectural form that can lend itself to a range of interior design styles.
They are moderately easy to care for and will thrive in a reasonably wide range of conditions.
It is well suited to indoors growth and can thrive even with little care.
Dragon Tree Varieties
There are a number of named cultivars to consider when choosing a dragon tree to grow as a houseplant in your home.
D. marginata ‘Tricolor’ and D. marginata ‘Variegata’ are the most commonly grown cultivars here in the UK and have received an RHS Award of Garden Merit.
Other named cultivars include ‘Colorama’, ‘Magenta’, and ‘Tarzan’. See more types here.
Where To Grow
D. marginata should be grown indoors, in a light and bright location, but out of direct sunlight, which can cause burning to the foliage.
Choose a location where temperatures consistently remain above around 15°C.
Optimum temperatures for a dragon tree are between around 21-26°C.
Regular household humidity should be absolutely fine for these plants.
However, if the conditions are particularly dry, consider increasing humidity by grouping this with other houseplants, and perhaps by misting lightly every week or so in drier periods.
While this plant can do well as a lone houseplant, it may do better when grouped with several other low-maintenance tropical plants.
“Once temperatures are consistently above 10°C, D. marginata can be moved outside, ideally in dappled shade and not in full sun, where it can be enjoyed perhaps as part of a patio arrangement,” says Roy, a Master Horticulturist and Professional Gardener.
Plant Care
Container & Growing Medium
D. marginata should be placed in a container of sufficient size to accommodate its root system, with around an inch or so of the medium around each side.
In terms of the growing medium: a well-drained, fertile, loam-based compost is the best choice.
Watering
Watering is where many houseplant owners may go wrong when it comes to caring for D. marginata.
D. marginata grows rather slowly, and will typically only need to be repotted every 2-3 years.
Topdressing your container with a new layer of compost on the top is worthwhile doing more often, however.
It is a good idea to replace the top section of growing medium annually, to replace less fertile and compacted material.
Both repotting and refreshing/top dressing are best done in the spring.
Pruning
These plants do not typically require any pruning at all.
However, if necessary, weak stems can be cut back to around 15 cm in the spring.
Propagation
If you would like to make new plants from an existing dragon tree, it is unlikely that you will be able to collect any seed when growing indoors.
However, it is reasonably easy and straightforward to take cuttings from the tree that will increase your own stock of houseplants or give you plants to give away as gifts, perhaps, to family or friends.
Stem cuttings from D. marginata will root relatively easily in water, and it is unlikely that you will need to use rooting hormone to get cuttings to root successfully.
You can also propagate D. marginata by beheading; cutting off the top section of the plant, planting in potting compost and placing it on a heat mat or in a propagator to give some bottom heat until the stem roots.
Or, by air layering where the stem is wounded and wrapped in sphagnum moss until roots appear and the stem can be cut away to make a new plant.
Tragopogon porrifolius is a plant cultivated for its ornamental flower and edible root
Getting Started Little-known but easy to grow, salsify produces long, slender, delicately oyster-flavoured roots. These are rarely available to buy, so to enjoy this unusual vegetable, sow outdoors in spring, in the ground or in deep containers, for harvests throughout the winter.
What and where to buy Salsify seeds are available in some garden centres and from online seed suppliers. You may also find the variety ‘Sandwich Island Mammoth’ (or just ‘Mammoth’), which produces larger roots with an improved flavour. Recommended Varieties Has strongly flavoured roots and smooth skin. Rough brown skin with creamy white flesh, similar to a long thin parsnip. Sow salsify outdoors in its final growing site, once the soil starts to warm up in April or May. Avoid transplanting, as that can cause the roots to fork.
Choose a sunny location with light, free-draining soil that is deep enough to accommodate the long roots, which can grow up to 30cm (1ft). Remove as many stones as possible, and break up heavy soil with a fork, adding garden compost to improve its structure.
Soil that is stony or has recently been manured can cause the roots to fork, in a similar way to carrots and parsnips.
Sow seeds thinly in shallow drills, 1cm (¼in) deep, with 30cm (1ft) between rows. Always use fresh seeds, as germination rates decline quickly, in a similar way to parsnip seeds. Be patient, as germination to be slow and erratic, taking two or three weeks. When the
seedlings are large enough to handle, thin them out to 10cm (4in) apart, removing the weaker ones.
Alternatively, sow two or three seeds at intervals of 10cm (4in) along the row. If more than one germinates in each group, take out the smaller seedlings to leave just one.
Seeds can be sown in a similar way in large containers at least 30cm (1ft) wide and deep, filled with multi-purpose compost. 4
Plant Care
Salsify is slow growing, but needs little maintenance – just keep plants weed-free and water in long dry spells.
Watering
Water young seedlings regularly if conditions are dry. Once established, salsify should only need watering in long dry spells, to prevent the roots splitting.
If growing salsify in a container, water regularly throughout the growing season.
Mulching
Apply a thick layer of garden compost around salsify plants in late spring to help prevent the soil drying out in summer and deter weed germination. Feeding Salsify shouldn’t need any feeding. Weeding Weed this slow-growing crop regularly to stop weeds getting established and outcompeting it. Use a hoe between rows, but hand weed close to the plants to avoid damaging the top of the roots. Pest protection Protect salsify seedlings and young plants from slugs and snails. 5
Harvesting Salsify roots are ready to harvest from late September. They can be left in the ground and dug up whenever required, through winter and into early spring. Frost helps to sweeten the flavour, in a similar way to parsnips.
Lift the long slender roots very carefully, as they snap easily and bleed if cut. Ease them out with a fork rather than pulling them up From autumn onwards, protect the top from frost with a layer of straw or fleece In very cold locations or where the soil is prone to waterlogging, lift and store the roots in sand or sawdust and keep in a cool, frost-free garage or cellar. Salsify roots have a tough, inedible skin. Removing it can be tricky, as uncooked roots produce a sticky latex. So it’s best to cook the roots first, then peel them.
To enjoy the delicate oyster-like flavour, simply steam the roots, peel them, then serve with butter as a side dish. Like other winter root crops, they can also be mashed, roasted or sautéed, and added to many other hearty dishes, such as soups and stews.
If you leave some of the roots unharvested, salsify will re-sprout from the base in spring. These young shoots can be blanched to provide an additional crop: In early spring, cut back the old leaves to within 2.5cm (1in) ground When new shoots appear, cover them with a mound of soil 10–15cm (4–6in) high, to exclude light. In heavy soil, it’s better to cover with straw or an upturned bucket Harvest the blanched shoots as they appear above the mound, carefully clearing away the soil Cook them like asparagus Spring leaves can also be cut when 15cm (6in) tall, without
blanching, but are not as tender. They can be used like spring greens.
If left to grow, salsify will flower in its second summer – the pink-purple petals are edible and add a bright splash of colour to summer salads. The flower buds can also be steamed or sautéed. Salsify is easy to grow and is rarely troubled by pests or diseases.
Slugs and snails will eat the
seedlingsand soft young shoots, so put protection in place.
To stop the roots forking, remove stones from the ground before sowing, and don’t sow in ground that has recently been manured.
Keep plants well watered in dry spells, to prevent the roots splitting or becoming fibrous.
The roots can grow very long (up to 30cm/12in) and snap easily, so take care when harvesting – use a fork to loosen the soil and lever them out gently. Common problems
Bolting is the term applied to vegetable crops when they prematurely run to seed, usually making them unusable. A cold spell... Bolting in vegetables
Slugs are widespread animals which can cause problems in the garden, eating holes in leaves, stems, flowers, tubers and... Slugs
Snails are familiar animals that can cause a lot of damage in the garden, eating holes in leaves, stems... Snails
Rhododendrons are popular flowering shrubs. Many rhododendrons are evergreen, but deciduous varieties are available.
Rhododendrons are perfect for growing in a shady spot. Plant them in humus-rich acidic soil in a sheltered spot in partial shade or full sun. Mulch rhododendrons annually and water well with rainwater.
While unlikely, if ingested by pets, all parts of azaleas and rhododendrons cause nausea, vomiting, depression, difficulty breathing and even coma. They can be fatal to dogs if eaten in large enough quantities.
Rhododendron: plant profile
Botanical name: Rhododendron Common name: Rhododendron Plant type: Shrub, Evergreen Flower colours: Pink, purple, red, orange, yellow Plant in: March-April, September-December Flowers in: April-July Take cuttings: July-August Prune in: March Sun exposure: Full sun, dappled shade, partial shade Hardiness: Hardy Soil type: Well drained / light / sandy / clay / heavy / moist / acidic Wildlife: Known for attracting bees Toxicity: Can be toxic to cats, dogs, horses and livestock
Grow rhododendrons only if you have neutral to acidic soil – use a test kit to measure the pH of your soil and check neighbouring gardens to see if rhododendrons or other acid-loving plants grow well in your area. Then, chose a sheltered spot in partial shade to full sun. Many rhododendrons suit planting at the edge of a woodland border or shady area. Dwarf alpine rhododendrons work well in rock gardens. Smaller varieties look best at the front of a border, or in pots.
How to plant rhododendrons
All rhododendrons require humus-rich, neutral to acidic soil that's moist but well-drained. Use peat-free ericaceous compost for pots. Rhododendrons are shallow-rooted plants, so make sure the roots are just below the soil's surface. Dig a hole that's wider than it's deep and back fill with leaf mould and peat-free ericaceous compost. Water well.
How to care for rhododendrons
Mulch rhododendrons in borders annually with an acidic mix of leaf mould, peat-free ericaceous compost or conifer bark chippings. For container-grown rhododendrons, replace the top layer of compost with fresh peat-free ericaceous compost, or repot completely in spring and feed with an ericaceous fertiliser. Water with rainwater as much as possible – tap water might contain too much calcium. There should be little or no need to prune, but deadheading spent blooms after flowering can improve the appearance of your shrub.
How to propagate rhododenrons
How to grow rhododendrons - how to propagate rhododendrons
Species rhododendrons can be grown from seed, but cultivars should be propagated from cuttings and layering. Take heel cuttings of rhododendrons in late summer and autumn. Layering rhododendrons involves taking a low-growing branch and pegging it to the ground so it can take root. This is best done in late-summer.
Growing rhododendrons: problem solving
There are no known pests affecting rhododendrons. However, the fungal disease rhododendron leaf spot can affect the leaves, causing them to drop.
This disease, caused by the fungus Glomerella cingulata, results in rounded spots on the leaves. Although it's unsightly, leaf spot is only a significant problem on poorly growing or unhealthy plants, which might end up dropping a substantial number of leaves.
Symptoms
A fungal attack causes an outbreak of spots on the leaves. The dark marks are often surrounded by a pinkish-purple ring.
Organic
Promptly remove and destroy all infected leaves, both on the plant and on the ground. Don't put them on the compost heap. Also, improve the growing conditions - add a mulch of well-rotted compost, and regularly feed and water. Keep deadheading.
Rhododenron ponticum is on the invasive plant list, so should not be planted in gardens and should be removed where possible.
Sometimes rhododendrons stop flowering. Find out why, and how to resolve the problem, in our Quick Tips video:
Why has my rhododendron died?
Rhododendrons sometimes succumb to over-watering. Too much water around the rootball prevents the roots from being able to take up vita nutrients and can, effectively 'suffocate' the plant. However, under-watering can also kill rhododendrons. Their roots are shallow, meaning they don't have a large tap root with which to draw water up from deep in the soil. Other reasons for sick or dead rhododendrons include planting too deeply (remember rhododendrons are shallow-rooted) and applying too much fertiliser.
More like this
To revive a sick rhododendron, first check its roots, and replant it if it's growing in too wet or dry soil, or if planted too deeply. Then, prune away damaged stems. Water sparingly and apply an ericaceous liquid feed as the flower buds are developing in spring, only.
Advice on buying rhododendrons
Rhododendrons are available from a wide range of garden centres and nurseries. Bear in mind that some specialist nurseries will have more choice than garden centres
Check plants over to make sure they look healthy and have no signs of damage or disease
How to grow rhododendrons - Rhododendron yakushimanum 'Koichiro Wada'
Rhododendron ‘Pleasant White’ - a dwarf, evergreen rhododendron with white flowers. It will suit a small garden, in a semi-shady border, or can be grown in containers.
Rhododendron ‘Scintillation’ - a large shrub, growing to over 2m. The pink and apricot blooms are very exotic and it will brighten up any area in part shade. A very hardy cultivar, it's a good for more exposed and northerly areas.
Rhododendron ‘Nancy Evans' - a gorgeous, golden-yellow compact rhododendron with leaves that are bronze when young but mature to a deep green. It looks good in a border and in containers.
Rhododendron ‘Vulcan’ -a compact variety, with long leaves and large, scarlet blooms that will suit containers or a mixed border. It needs a sheltered spot in partial shade, and protection from winter winds.
Rhododendron ‘Orakel’ - a hybrid with purple blooms with a crimson-red blotch. Hardy and compact it's ideal for a mixed border or container display. Protect from harsh winter winds.
Rhododendron yakushimanum 'Kochiro Wada' - one of a group of compact hybrids, this variety has white flowers, with silvery young leaves that mature to dark green. The Royal Horticultural Society has given it the prestigious Award of Garden merit (AGM).
Rhododendron luteum - also known as Azalea pontica, this is a bushy, upright shrub with fragrant yellow flowers and good autumn colour. It can be toxic to people and animals but is good for bees that love the nectar rich flowers.


